Following on from our Viking project there seemed to be only one way to finish it; build and decorate a Viking boat!
Along with learning about how the Vikings lived, what they ate and what they believed in we had made some runes and some awesome Viking shields but the different types of boats seemed to really intrigue them.
Looking at the different types that the Vikings used I decided that we would make a longboat.
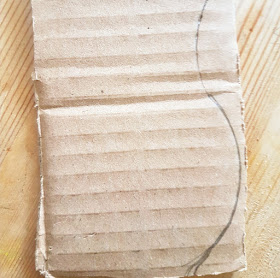
We started off with three equal length rectangular pieces of card. Taking one piece the boys drew a triangle on each end to create the bow and stern. They then cut around to shape.
Using one of the remaining two rectangular pieces the boys bent and shaped it to match the base. I then used a hot glue gun and stuck and sealed the two parts together.
They then repeated the process with the final piece creating a port and starboard to the ship.
Whilst the sides were drying we decided to create the head piece that goes on the bow of the ship. We had watched a great clip that showed that these were usually fierce creatures like dragons to scare the people they were invading! Some have even suggested that this is where "sea monsters" myths may have come from.
Using a cup as a circular template the boys drew round on some cardboard to shape the "belly" of the monster.
They then drew a pointed head to create the scary face. They repeated this process to have a joining and even front.
Using hot glue on the inside of both pieces they stuck the shape to the dried boat structure.
Then held into place until dry.
It was time to add the seating area for the boat. The boys measured out and cut small strips of card that was longer than the hull to allow us to bend and glue.
Once shaped the glue was applied and then needed to be held into place until dry.
Along with the fierce monster design on the front we had learnt that Vikings liked bright colours. Using a foam pad the boys painted red and blue squares along the side.
Viking long ships would also be decorated with the warriors shields; they were usually found on the side for decoration and for easy access in a quick defence.
Using a circle and drawn into quarters they decorated the shield in the same colours as squares above. Of course in real Viking ships these would have been vastly coloured but we didn't have the time to decorate them all differently!
Using small cardboard squares and cocktail sticks the boys made some oars.
The gently pushed the pointed end into the cardboard and sealed with some glue. Then using one spare cocktail stick they pushed through the sides of the boat to make the holes for their oars to go in.
Once fully dried and ready the boys had one long Viking boat!
The design is really simple to follow. However, it is extremely time consuming, especially if you are holding parts to dry. I used a hot glue gun to help the different sections dry quicker and stay firm but wouldn't suggest any children try using one.
The boys absolutely loved it and it finished off an amazing terms topic. What do you think?


This is brilliant and yet again I admire their mother's incredible creative talent which must have rubbed off on them!
ReplyDeleteNat.x
This is epic! Good work. Being a fan of the show Vikings and having just gone to York I can honestly say this is the best Viking Long Boat ever!
ReplyDeleteLove this, I think ill steal this and do one with my little ones over the summer holidays. Thanks for sharing!
ReplyDelete